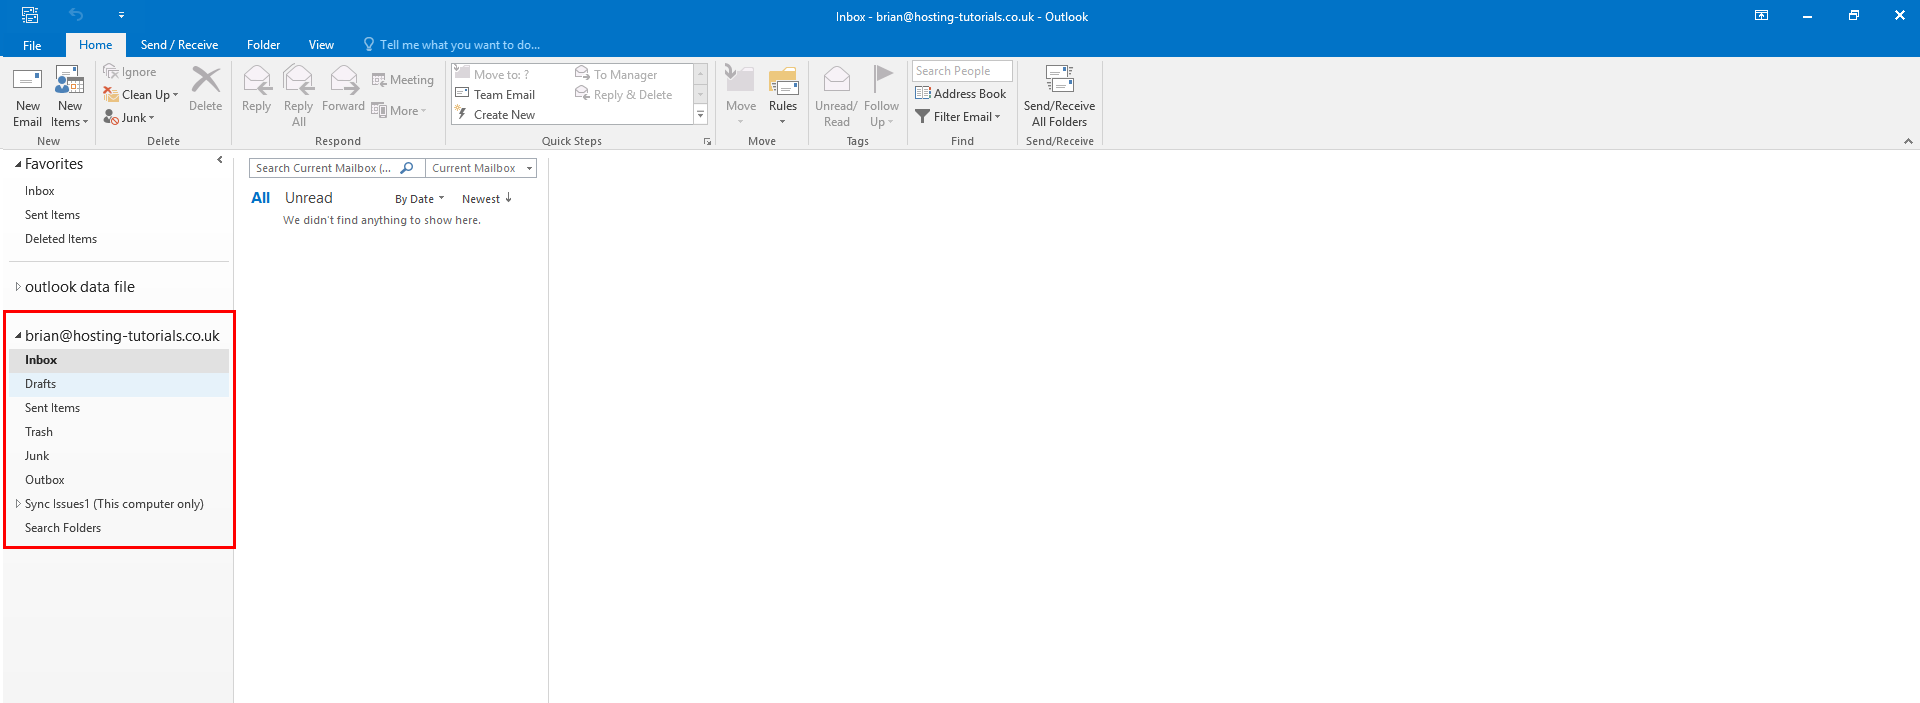
To setup your email account in Microsoft Outlook you will first need to open your desktop software.
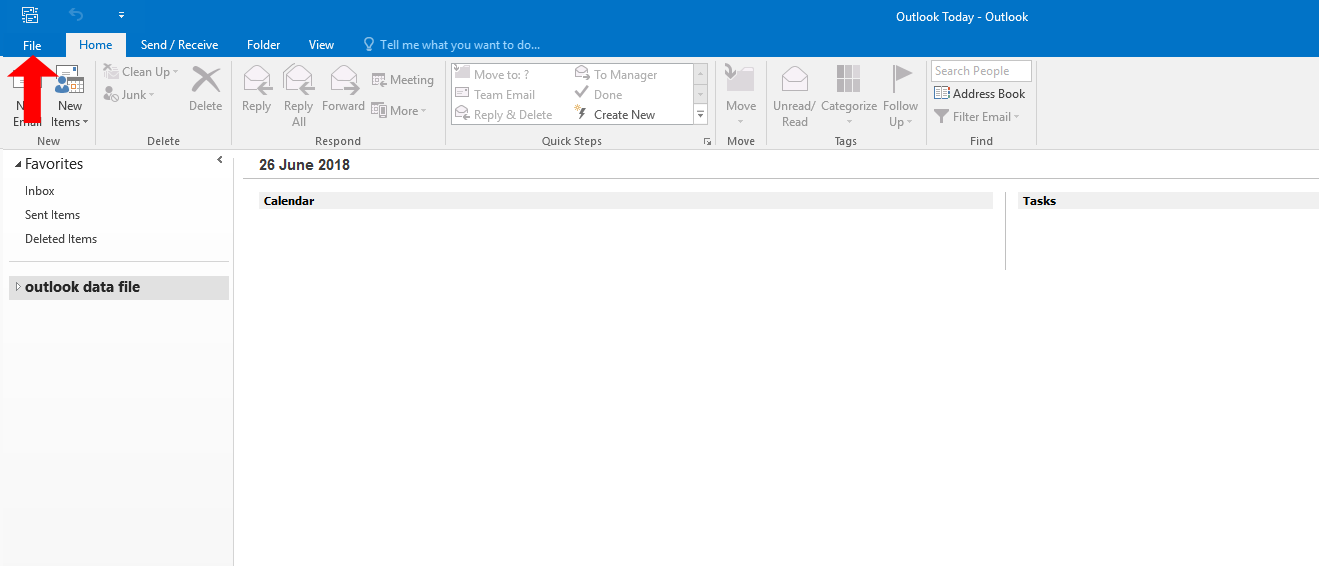
- From the menu at the top select the File menu.
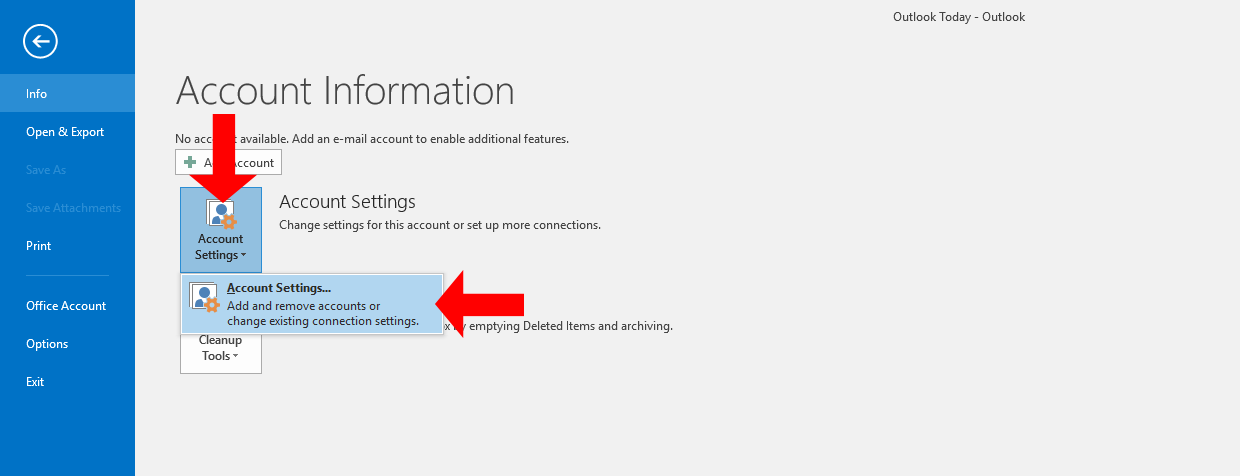
- Select the Account Setting dropdown then select Account Settings.
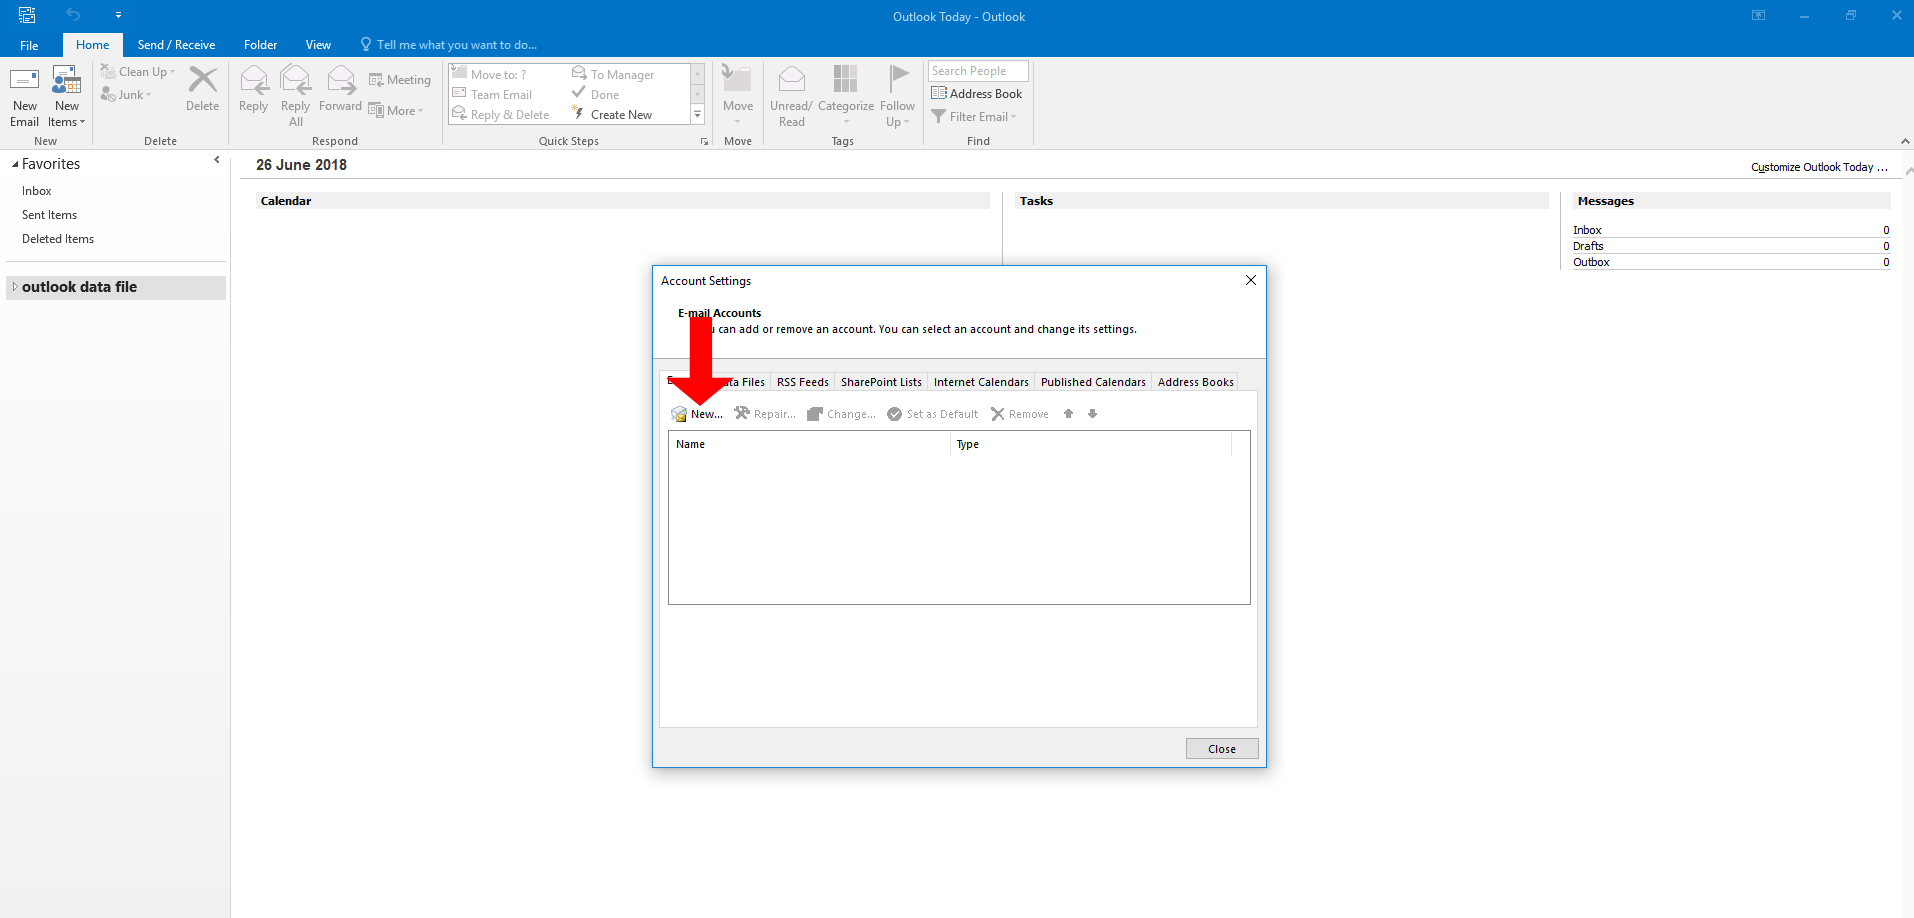
- From the Account Setting dialog select New to create a new email account.
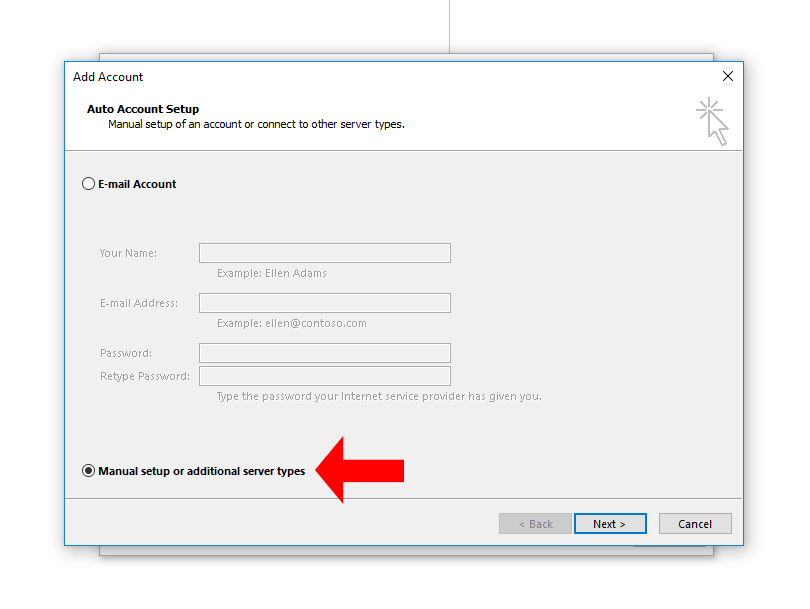
- The Add account dialog will now load, select Manual setup and then Next.
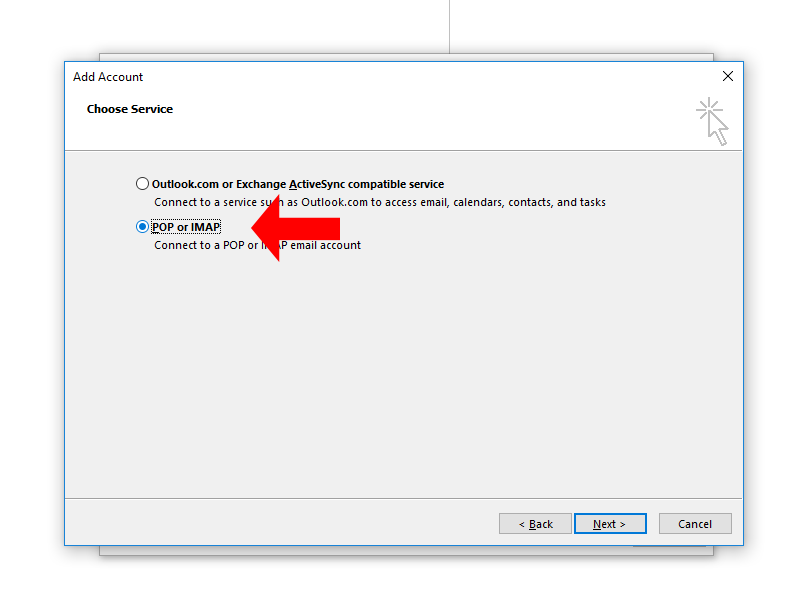
- You now need to select your service type, select POP or IMAP
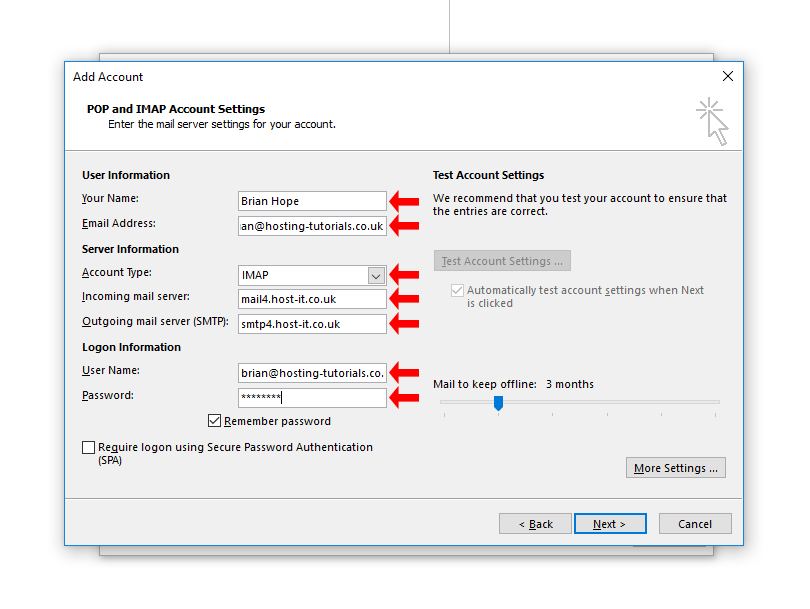
- You now need to enter in your account details and select your account type.
- Your Name: The name you want to have shown on the emails
- Email Address: This is your full email addres e.g. brian@hosting-tutorials.co.uk
- Account Type: You can select POP3 or IMAP, the settings are the same for both types of account
- Incoming mail server: mail4.host-it.co.uk
- Outgoing mail server: smtp4.host-it.co.uk
- User Name: This is your full email addres e.g. brian@hosting-tutorials.co.uk
- Password: The password that was set when your email account was created
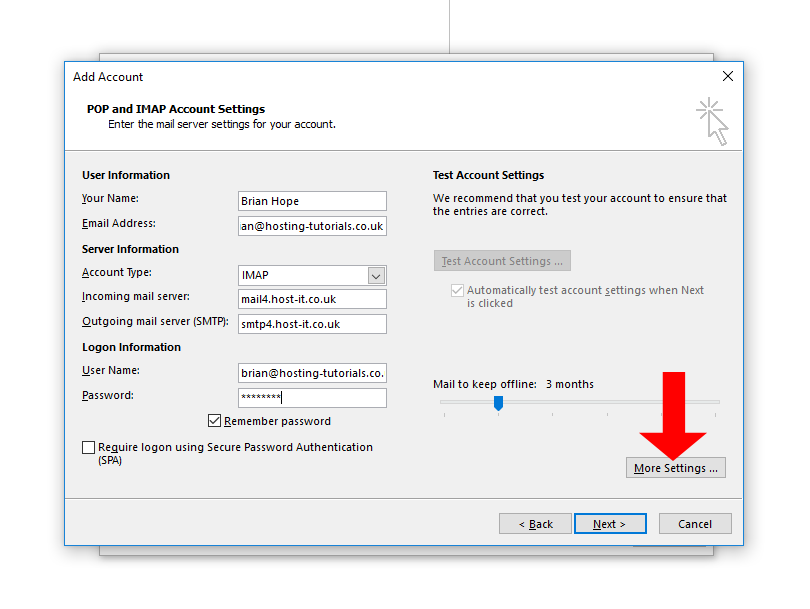
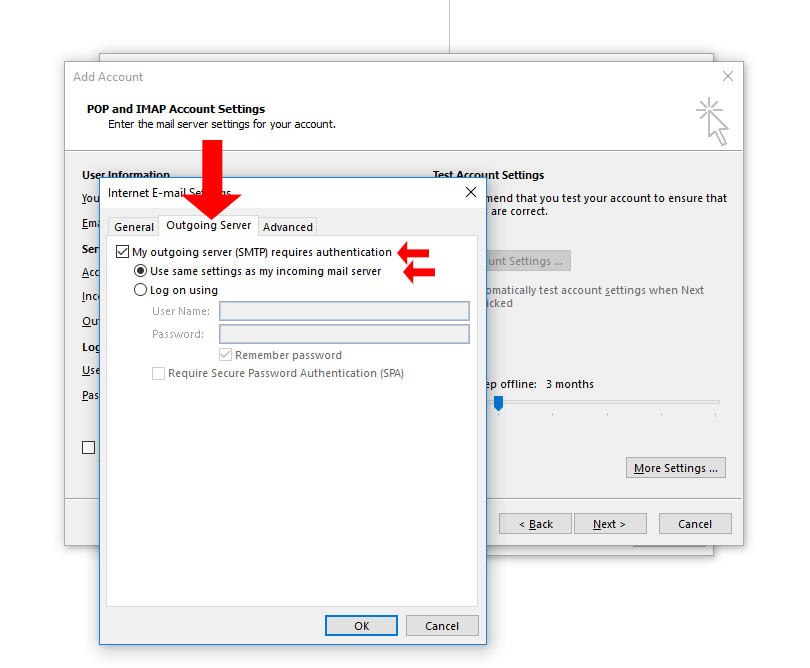
- To configure the outgoing mail authentication details select More Settings.
- Select the Outgoing Server Tab then enable My outging server (SMTP) requires authentication and select use same settings as my incoming mail server, then select OK to apply the changes.
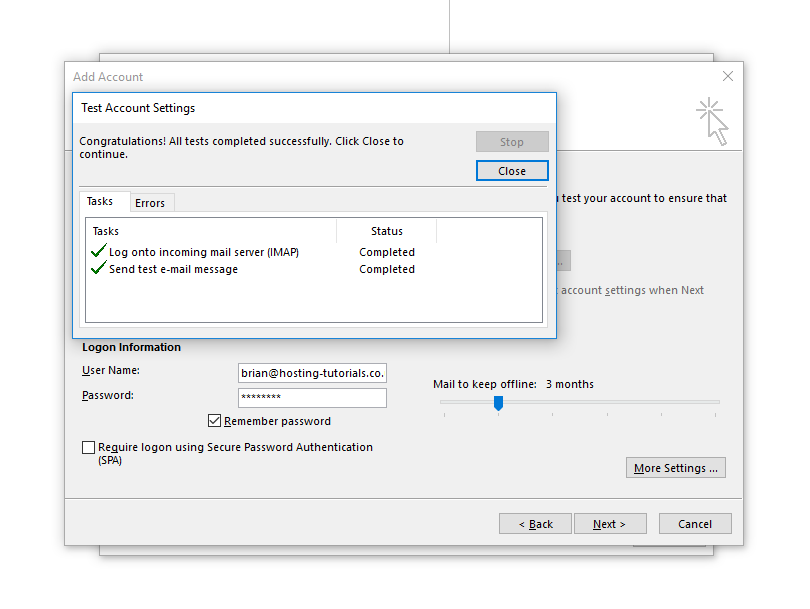
- From the POP and IMAP Account Settings page select next to test your account settings.
- Once the test is complete select Finish.
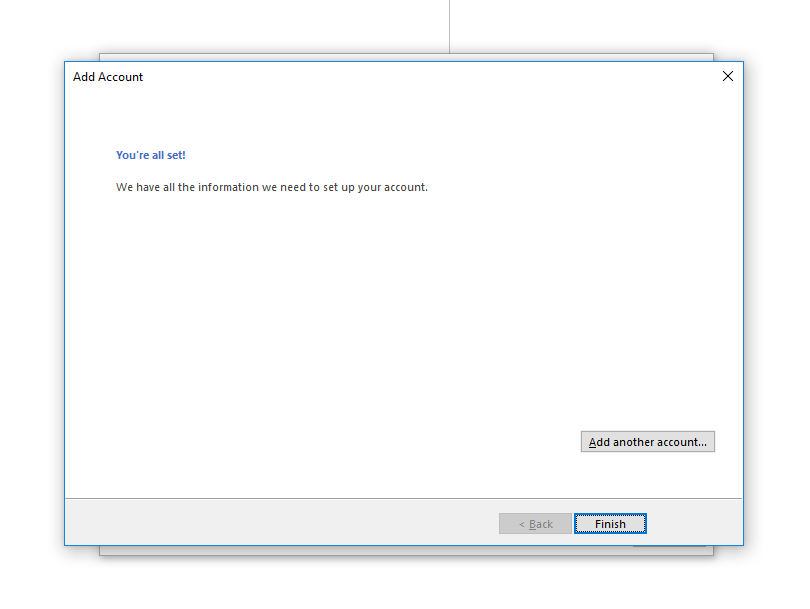
- You will now see that your new acconut has been added into Outlook and you can now send and receive email.
