To add an additional user you will need to login to your client portal.
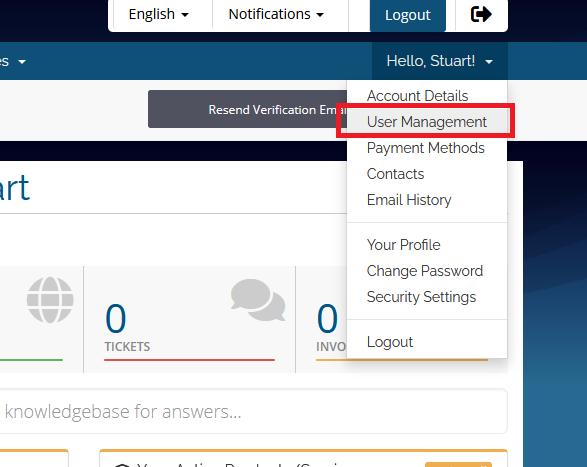
- Select your profile button at the top right of the screen select User Management.
- To add a new user to your account with the ability to login you will need to invite them by entering in their email address in the Invite New User section.
Once you have entered in their email address you will need to select the permissions that you want to give to the new user, by default this will give All Permissions but if you only want to grant limited permissions you will need to select Choose Permissions and then enable any permissions you want to provide, once you have entered in all the details select the Send Invite button to email an invite to user.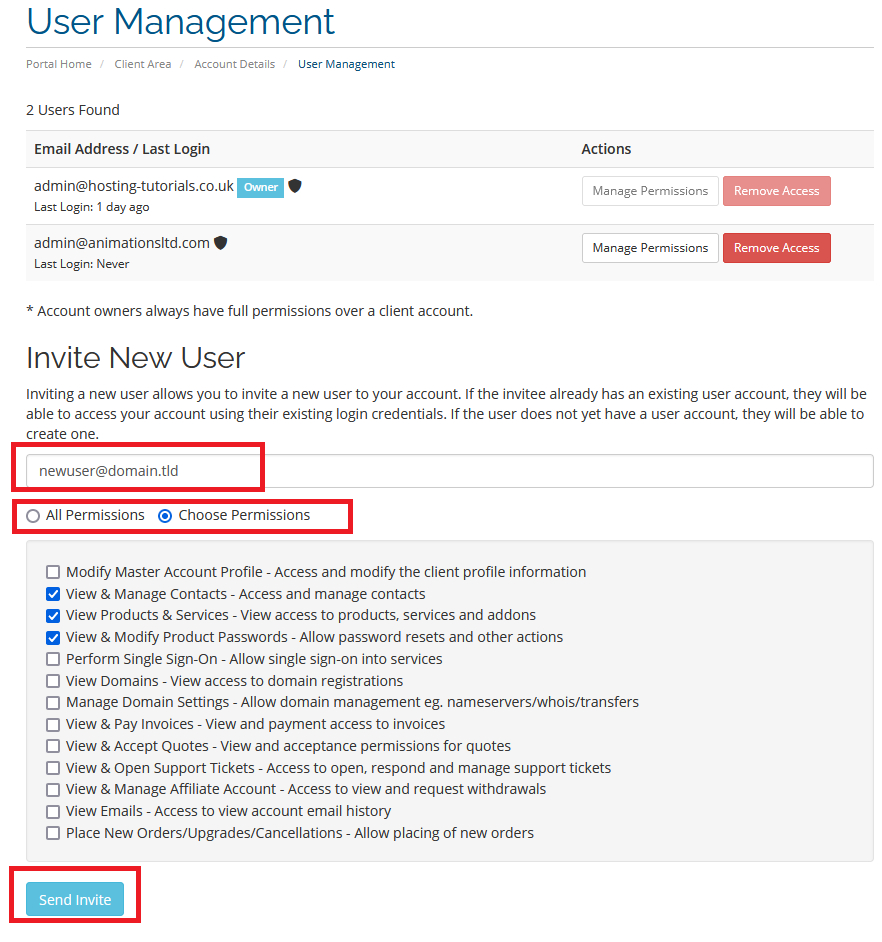
- Once you have sent the invite you will see the user added under the Pending Invites section, you will have the option to resend the invite or cancel the invite.
The user you have added will receive an email with a link to accept the invite, when selecting the link they will be taken to the client portal where they can login with an existing account or register a new user account, once this has been completed the user will then be able to access your account with the permissions you have set.
